Build an Escape Game in 30 Minutes
From blank canvas to playable game. No coding, no prior experience — just follow along.
What You'll Build
- 3 connected rooms with navigation
- A combination lock puzzle
- Inventory items & combinations
- Event-driven game logic
- A win condition
- A playable exported game file
The Game You're About to Build
The player starts in a Living Room. They find a note on the wall that reads "The code is the year this house was built." They explore the Kitchen, where a faded newspaper clipping reveals the year: 1952. Back in the Living Room, they enter 1-9-5-2 into the safe — it opens, revealing a rusty key. They pick it up, walk to the Bedroom, and use the key on the locked door. It opens. They escape.
How EscapeMaker is Structured
Rooms contain Scenes. Scenes contain Objects. Objects can have Puzzles. Events watch for triggers (puzzle solved, object clicked, item used) and fire Actions (show object, play sound, change scene). That's the whole model.
Step 1: Create a New Project
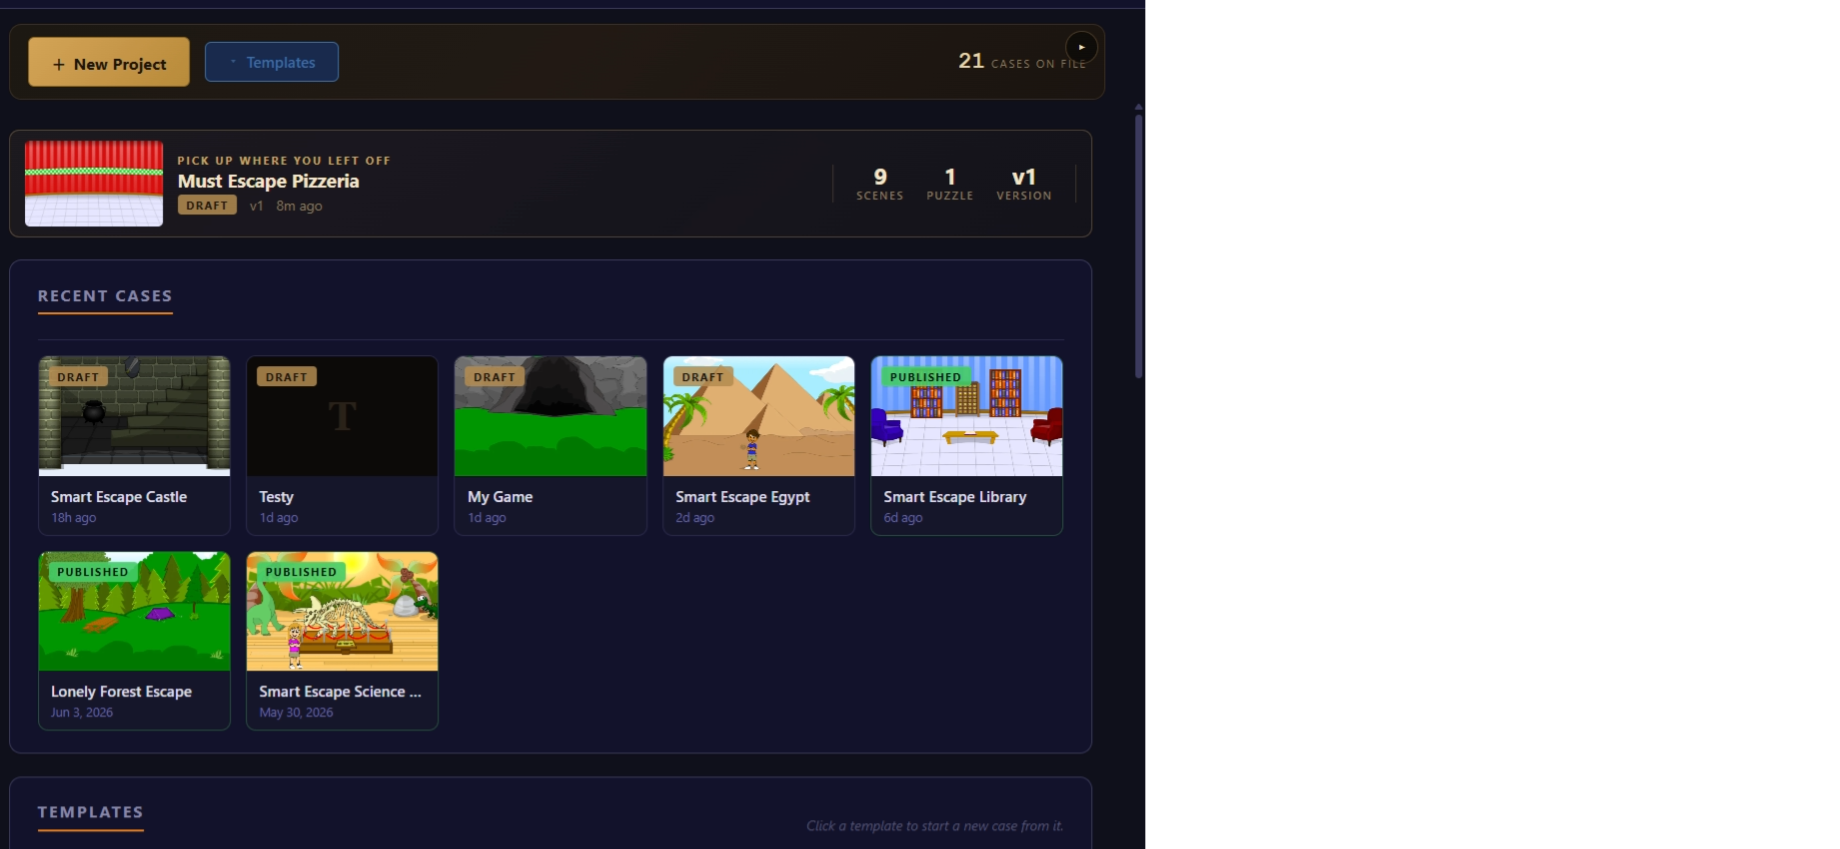
~2 min- Open EscapeMaker in your browser — you'll see the Project Picker
- Click New Project
- Name your game (e.g., "My First Escape")
- A new project opens with a single blank scene
Step 2: Set Up Your First Room
~3 minEvery escape game starts with a room. Let's turn your blank scene into one.
- Open the Assets panel (right side)
- Click Upload and add a background image (any 960×540 or similar image works — a photo of a room, a drawn scene, even a placeholder)
- In the Properties panel, set the scene's Background to your uploaded image
- Right-click the scene in the left panel and choose Rename — call it "Living Room"
room-view is for main explorable areas (this is the default). Later you'll use close-up for zoomed-in views and popup for overlays like reading a note.Step 3: Add Objects to the Scene
~5 minObjects are everything the player can see and interact with — keys, books, switches, doors, decorations.
- Click + Object in the toolbar and choose Sprite
- Upload or select an image for the object (e.g., a key, a book, a locked safe)
- Drag the object to position it on the canvas
- Use the corner handles to resize — hold Shift to keep proportions
- In the Properties panel, give it a meaningful name (e.g., "Key", "Safe", "Bookshelf")
- Add 3–4 objects to your room
Object Ideas for Your First Room
- A locked safe — we'll attach a puzzle to this in Step 5
- A key — make this small and partially hidden (collectible item)
- A painting — the player might find a clue behind it
- A door — this will lead to another room
Step 4: Add More Rooms & Navigation
~5 minEscape games need multiple rooms to explore. Let's connect them.
- Click + Scene in the toolbar to create a second scene
- Add a background image and rename it (e.g., "Kitchen")
- Create a third scene the same way (e.g., "Bedroom")
- Go back to "Living Room"
- Open the Navigation panel (right side)
- Under Direction Links, set Right to "Kitchen"
- Switch to "Kitchen" and set its Left to "Living Room" and Right to "Bedroom"
- Switch to "Bedroom" and set its Left to "Kitchen"
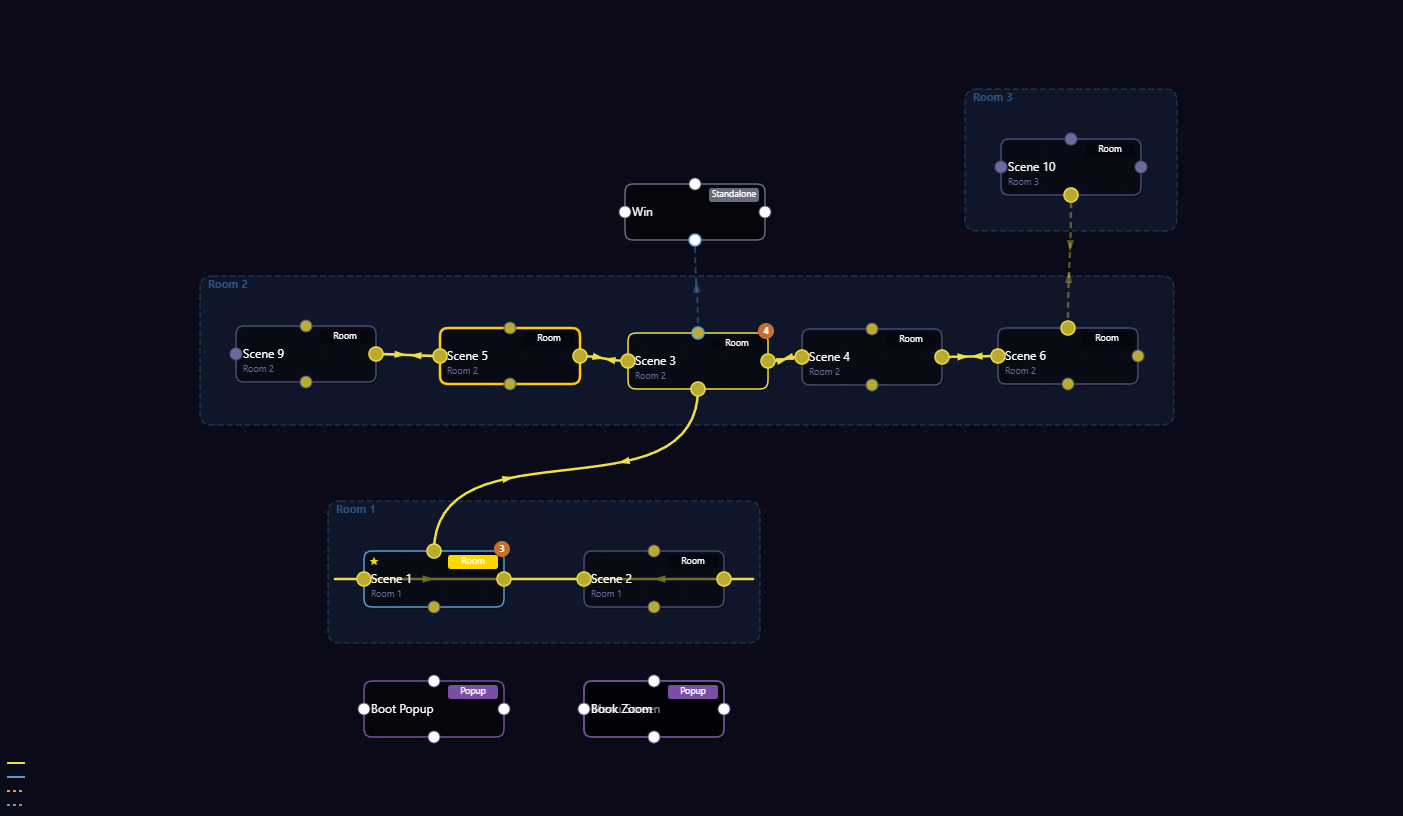
room-view scenes within the same room are automatically linked with left/right arrows. If your scenes are in separate rooms, you need to link them manually.Step 5: Add a Puzzle
~5 minPuzzles are the heart of every escape game. Let's add a combination lock to the safe.
- Select the safe object in your scene
- Open the Puzzles panel (right side)
- Click Add Puzzle and choose Combination Lock
- Set the number of digits (e.g., 4)
- Set the correct combination (e.g., 1-9-5-2)
- Under Puzzle Link, make sure it's linked to the safe object
Now when the player clicks the safe, the combination lock UI opens automatically.
9 Puzzle Types Available
Combination Lock is just one option. EscapeMaker includes:
- Combination Lock — enter a numeric code
- Pattern Match — reproduce a pattern on a grid
- Wire Puzzle — connect matching pairs
- Jigsaw — arrange scrambled pieces
- Slider — slide tiles into the correct position
- Key Lock — requires a specific inventory item to open
- Item Slots — place the right items in the right slots
- Sequence — click objects in the correct order
- Image Button — cycle images on buttons to match a target
Step 6: Create Inventory Items
~5 minInventory items are objects the player picks up and carries with them — keys, tools, clues.
- Open the Inventory panel (right side)
- Click Add Item
- Name it (e.g., "Rusty Key") and upload a small icon image
- Now make an object in the scene collectible: select the key object on the canvas
- In Properties, check Collectible
- Set which inventory item the object gives when collected (select "Rusty Key")
When the player clicks the key object, it disappears from the scene and appears in the inventory bar at the bottom.
Item Combinations
You can also combine inventory items:
- In the Inventory panel, find Item Combinations
- Set Item A + Item B = Result Item
- Example: "Key Handle" + "Key Blade" = "Complete Key"
Step 7: Wire Up Events
~5 minEvents are the brain of your game. They define what happens when the player does something. Think of them as: "When X happens, if Y is true, do Z."
Example: Puzzle Solved → Reveal a Hidden Item
- Open the Events panel
- Click Add Event
- Trigger: Select Puzzle Solved, then pick your combination lock
- Action: Select Show Object, then pick a hidden object (e.g., a note with a clue that was previously invisible)
Now when the player cracks the combination, the hidden clue appears!
Example: Use Item on Object → Unlock a Door
- Add another event
- Trigger: Item Used On Object — select "Rusty Key" and the door object
- Action: Change Scene — navigate the player to a new room
- Optionally add a second action: Play Sound for a satisfying door-unlock effect
Example: Win Condition
- Add one final event
- Trigger: Object Clicked — select the exit door
- Condition: Has Item — check that the player has a specific "escape" item
- Action: Win Game
More Event Ideas
- Object Clicked + Has Item → Show Dialogue ("The key fits!")
- Scene Entered → Play Sound (ambient room noise)
- All Puzzles Solved → Show Object (reveal the escape route)
- Object Clicked → Go To Frame (flip a switch from off to on)
- Item Used on Object + Condition: Flag Set → Change Scene
Step 8: Test & Export
~3 minTesting Your Game
- Click Test Game in the toolbar — your game opens in a new tab
- Play through the entire game from start to finish
- Check every puzzle, every item pickup, every event
- If something doesn't work, close the test tab, fix it, and test again
Exporting Your Game
- Click Export in the toolbar
- Choose your format:
- Single HTML File — everything embedded in one file, ready to share or upload
- ZIP Package — separate files for hosting on a web server
- The export dialog shows a pre-flight check — make sure everything passes
- Click Export and download your game
You Did It!
You've built a complete escape game with rooms, objects, puzzles, inventory, and event logic — all without writing a line of code.
Ready to build your next game?
You know the tools. You know the flow. Now make something amazing.
Explore the Full Wiki