Polish, Publish & Game Settings
- Navigate all sections of the Game Settings panel
- Configure gameplay options, sound, transitions, and navigation arrows
- Set up the menu screen and end screen
- Add custom fonts and set player UI theme colors
- Use the thumbnail editor and version history
- Publish your game to the portal
Game Settings Panel
Open the right panel and click the Game Settings tab. This is the central control panel for everything global about your game — settings that apply across every scene and affect how the published game looks and behaves for players.
The panel is divided into collapsible sections. The following steps cover each section in order.
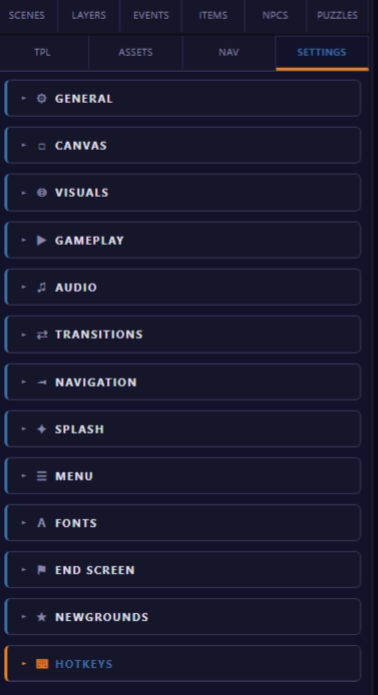
Game Settings Panel — every global option lives here, organized by section.
Gameplay Settings
The Gameplay section controls the fundamental rules of your game:
- Game Name — The name displayed in the browser tab and on the portal game card.
- Start Scene — Which scene the player begins in. This overrides the scene that was set during the new-game wizard if you want to change it later.
- Timer — An optional countdown timer shown to the player in the player UI. Set the maximum time in seconds. When the timer reaches zero you can trigger a "Game Over" event. Leave disabled for untimed games.
- Show Game Map — Whether the in-game map button is visible. The in-game map shows the Scene Map (room connection graph) to the player so they can see where they've been and where they can go. See the note at the bottom of this tutorial before enabling this.
Sound Settings
The Sound section provides global volume controls that act as multipliers over individual asset volumes:
- Master Volume — A global multiplier applied to all audio in the game (0–100). Setting this to 50 makes everything half as loud, regardless of individual asset settings.
- Music Volume — A separate multiplier applied only to background music tracks.
- SFX Volume — A separate multiplier applied only to sound effects (puzzle solves, button clicks, ambient sounds).
Keeping music and SFX volumes separate lets players who want story atmosphere but find sound effects distracting find a comfortable balance — and you can pre-tune the defaults so the mix sounds intentional.
Scene Transitions
The Transitions section controls how scenes animate when the player navigates between them:
- None — Instant cut. The new scene appears immediately. Fast but jarring for most games.
- Fade — The current scene fades to black, then the new scene fades in from black. Smooth and works with any art style.
- Slide Left / Right / Up / Down — The current scene slides out in the chosen direction while the new scene slides in from the opposite side. Gives a strong spatial sense of direction when the transition matches the navigation direction (e.g., slide left when the player goes left).
Transition speed is set in milliseconds. Recommended range: 200–800ms. Shorter feels snappier; longer feels more cinematic. Avoid values above 1000ms as they make the game feel sluggish.
Navigation Arrow Style
The Navigation Arrow Style section controls the look of the directional navigation UI shown to the player in-game:
- Thin Bar — Small, discreet arrows at the screen edges. Minimal UI presence, ideal for games where the art should dominate.
- Full Bar — Larger bars with prominent icons at the screen edges. Easier to click on touch screens.
- Centered Buttons — Large directional buttons in the center-bottom area of the screen. Best for very casual audiences or younger players.
Additional options in this section:
- Arrow Color — Set a hex color for the arrow icons and bars.
- Opacity — Set how visible the arrows are (0–100). A value of 60–70 lets arrows hint without overpowering the background art.
Menu Screen
The Menu Screen section configures the splash screen players see before clicking "Play". This is the first impression — make it count.
- Background Image — A full-size image shown behind the menu. Use a dramatic screenshot, key art, or a custom illustration.
- Title Text — The game name as displayed on the menu. Defaults to the Game Name field.
- Subtitle — An optional tagline displayed beneath the title (e.g., "Can you escape in time?").
- Button Label — The text on the play button. Options: "Play", "Start", "Begin Adventure", "Enter" — or write your own.
- Music — An optional music track that plays on the menu screen before the player clicks Play. This is separate from any in-game background music.
Custom Fonts
Go to Game Settings → Fonts. EscapeMaker supports Google Fonts and custom uploaded font files.
- Google Fonts — Type any Google Font name (e.g.
Cinzel,Oswald,Creepster,MedievalSharp). The editor loads a live preview. The font is embedded at publish time. - Custom Upload — Upload a
.ttfor.woff2file for a proprietary or hand-crafted font.
Set separate fonts for three text roles:
- UI Text — Labels, inventory counts, timer, button text in overlays
- Dialogue Text — Narration and character dialogue boxes
- Button Text — Puzzle overlay confirm/close buttons
Keeping these three fonts distinct gives your game a layered, designed feel. A serif font for dialogue and a clean sans-serif for UI is a classic combination.
Player Theme
Go to Game Settings → Theme. The theme controls the colors of the entire player UI chrome — the inventory bar, navigation arrows, dialogue boxes, and overlay panels.
- Primary Color — Applied to navigation arrows and the inventory bar border.
- Accent Color — Applied to buttons and highlights in overlays.
- Background Color — The fill color for UI panel backgrounds (inventory tray, dialogue box background).
- Text Color — Used for dialogue text, label text, and item counts.
Three built-in presets give you a quick starting point:
- Classic — Dark blue chrome with white text. Works well for mystery and sci-fi themes.
- Warm — Brown and gold tones. Suits adventure, fantasy, and historical settings.
- Minimal — Light grey chrome with dark text. Clean, modern, nearly invisible UI.
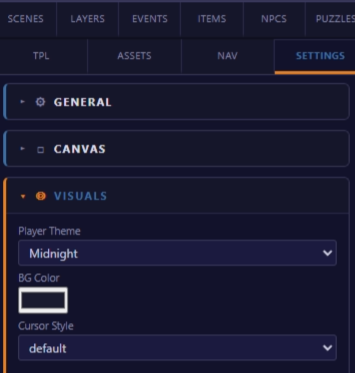
The Theme section — pick preset colors or customize each swatch individually.
End Screen
Go to Game Settings → End Screen. This section configures what players see when they win — triggered by a "Win Game" action firing anywhere in your events.
- Background Image — A full-size image for the end screen. Use a celebration illustration or a final reveal image.
- Title — The main heading shown (default: "You Escaped!").
- Subtitle — Optional flavor text beneath the title (e.g., "The mystery is solved. The artifact is safe.").
- Show Time — Whether to display the player's total completion time. Great for speed-run incentive.
- Show Collectible Count — Display how many coins, gems, or collectibles the player found vs. the total available.
- Replay Button — Set the label for the replay option shown on the end screen (e.g., "Play Again", "Try Again", "Replay").
Thumbnail Editor
Go to Toolbar → Thumbnail. The thumbnail editor opens a canvas where you build the game's portal card image — what players see when browsing the portal before clicking into your game.
- Background image — Upload a screenshot or key-art image as the base.
- Text overlays — Add a title text block with custom font, size, color, and drop shadow.
- Crop rectangle — Drag the handles to set exactly which portion of the image is used.
Recommended thumbnail size: 560 × 320px. This is the exact size shown on the portal game card. Larger source images are downscaled automatically, but start at this ratio for crisp results.
A strong thumbnail has: a clear focal point, readable title text, and enough contrast to read at small sizes. Think of it as a book cover — it must sell the game at a glance.
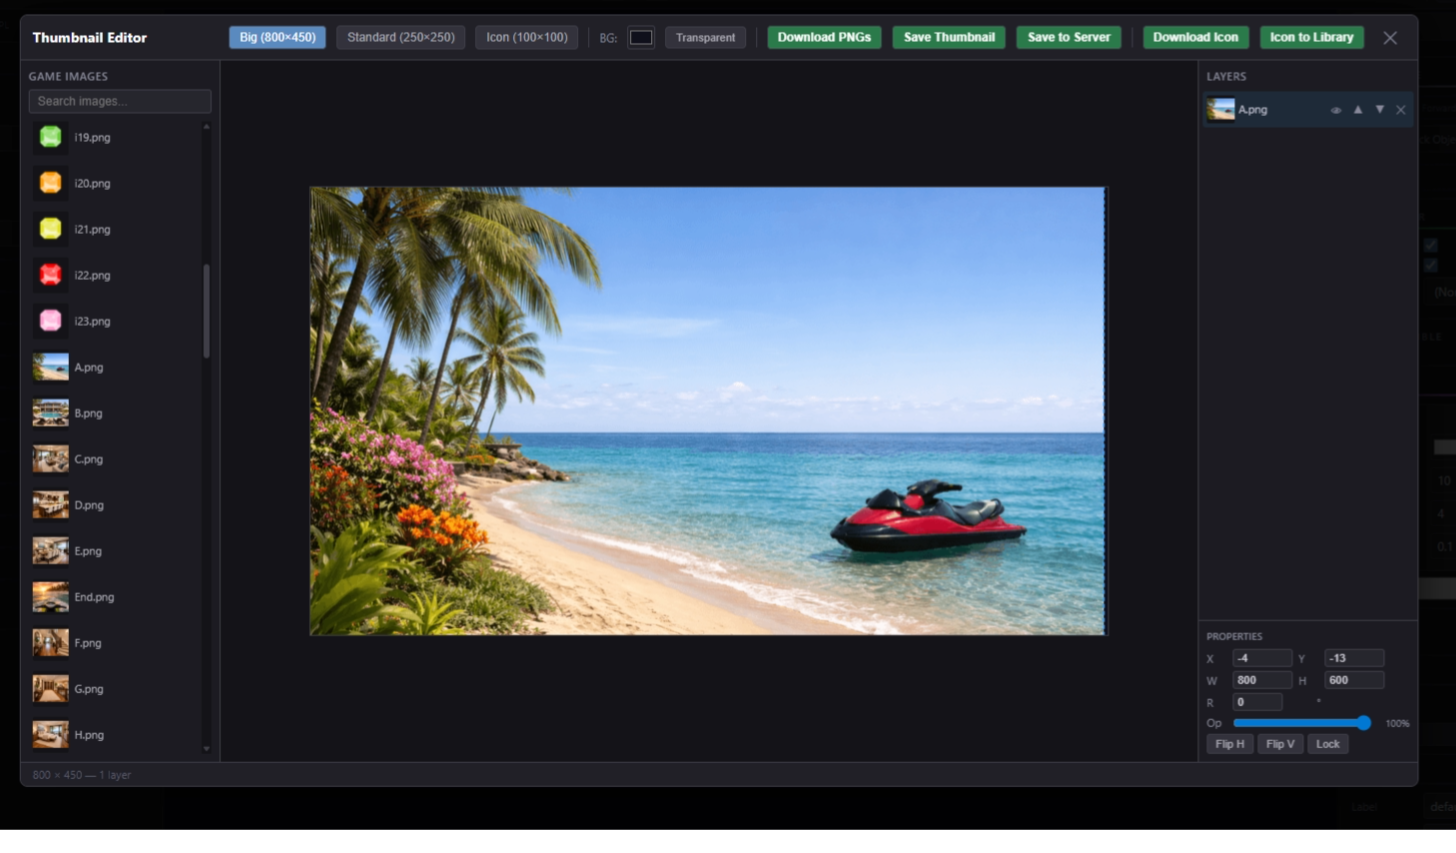
The Thumbnail Editor — compose your portal cover image with text overlays and cropping.
Version History
Go to Toolbar → Version History. This panel shows a timestamped list of saved snapshots of your game project.
- Auto-snapshots — Created automatically each time you save. Recent saves are kept; older ones may be pruned.
- Manual snapshots — Created by clicking "Create Snapshot". These are kept indefinitely and are ideal before a major editing session.
- Preview — Click any version entry to open a read-only preview of the game at that point in time.
- Restore — Click "Restore" on any version to roll the entire project back to that snapshot. This cannot be undone, so create a manual snapshot first if you are unsure.
Version history is your safety net. Use it aggressively before making large structural changes — deleting scenes, rebuilding event trees, or overhauling the navigation.
Publishing
Go to Toolbar → Publish. Every plan publishes to the Portal; the free plan publishes one game. Fill in the publish form:
- Title — The public-facing game title shown on the portal.
- Description — A short paragraph (2–4 sentences) describing the game premise. This shows on the game detail page.
- Category — Choose from: mystery, horror, adventure, sci-fi, fantasy, holiday, or other.
- Tags — Comma-separated keywords to help players find your game (e.g.,
room escape, puzzles, keys, horror). - Thumbnail — Confirm or re-upload the thumbnail you built in the Thumbnail Editor.
Click Publish. Your game is submitted for review and goes live once it is approved, usually within a day. After that, share the portal link to start collecting plays and ratings.