Timeline — Frame Animations & Sequences
- Understand the two animation systems in EscapeMaker
- Navigate the Timeline Panel and add keyframes
- Animate position, scale, rotation, and opacity
- Set easing on keyframes for natural motion
- Trigger animations from events
- Configure looping vs. one-shot animations
- Use the Frame Editor for sprite-sheet style animation
- Add frame children for multi-part animations
Two Animation Systems
EscapeMaker provides two complementary ways to animate objects:
- Timeline Animations — Smooth tweens between keyframes. Move, fade, scale, or rotate an object over a defined duration. Best for cinematic sequences, dramatic reveals, and UI transitions.
- Frame Animations — Rapid image swapping through a sprite sheet sequence. Good for sprite-sheet style loops: a walking character, flickering fire, spinning gears, animated water.
The two systems can be used together on the same object — for example, a Frame-animated fire sprite that also moves position via a Timeline tween.
The Timeline Panel
Select an object on the canvas, then open the Timeline tab in the left panel. The panel contains:
- A horizontal time ruler marked in milliseconds
- Property tracks: X, Y, Width, Height, Rotation, Opacity
- A playhead you can scrub to preview any point in time
- "Add Keyframe" button — records current property values at the playhead position
- Play button — previews the animation in the editor canvas
Each animation must be given a name (e.g. DoorOpen, CoinSpin) in the Timeline header. You will use this name to trigger it from events.
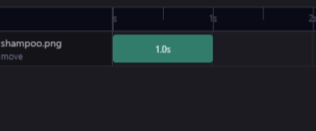
The Timeline Panel — diamond markers are keyframes. Drag to adjust timing.
Creating a Simple Move Animation
Example: a sliding door that opens when a lock is solved.
- Select the door object and open the Timeline Panel
- Name the animation
DoorOpen - Position the playhead at 0ms. Click "Add Keyframe" — this records the door's closed position
- Move the playhead to 500ms. Drag the door object to its open position on the canvas. Click "Add Keyframe"
- Press Play in the Timeline to preview the motion
The editor will tween the door smoothly from the closed position to the open position over 500 milliseconds. The object returns to its starting position in the editor after preview — the animation only runs in-game when triggered.
Keyframe Properties
Click on any keyframe dot in the Timeline to open its properties:
- Time (ms) — when this keyframe occurs
- Easing — the interpolation curve between this keyframe and the next:
- Linear — constant speed, mechanical feel
- EaseIn — starts slow, accelerates
- EaseOut — starts fast, decelerates
- EaseInOut — starts and ends gently, fastest in the middle. Most natural for physical objects.
- Values — the recorded property values at this keyframe (editable directly)
Triggering Animations from Events
In the Event Panel, add the action "Play Animation":
- Select the target object
- Choose the animation name from the dropdown (the names you gave in the Timeline)
The animation runs from frame 0 when this action fires. Combine it with other actions in the same event: a door sound effect, hiding the locked overlay, and playing the door open animation can all fire simultaneously.
DoorOpen, CoinSpin, LightFlicker, KeyPickup. Vague names like anim1 become confusing in large projects.
Looping Animations
In the Timeline panel, check the "Loop" checkbox to make an animation repeat indefinitely once triggered. The animation runs to the last keyframe, then immediately jumps back to the first and continues.
Use looping for ambient motion: a candle flame flickering, a gear slowly rotating, a hanging sign swaying, a loading indicator spinning.
Use one-shot (loop unchecked) for event-triggered actions: a door opening, an object falling, a coin flying into the inventory bar, a key spinning as it is picked up.
To stop a looping animation from an event, use the action "Stop Animation" and select the object and animation name.
The Frame Editor
For sprite-sheet style animation, select an object and open: right panel → Property Panel → Frame section → "Open Frame Editor".
In the Frame Editor:
- Add multiple image assets as frames in sequence
- Set the playback speed in fps (frames per second)
- The object cycles through the images automatically at runtime
- Toggle looping on or off
Common uses: animated fire sprite (4–8 frames), walking character (6–12 frames), water surface ripple, blinking light, spinning coin icon.
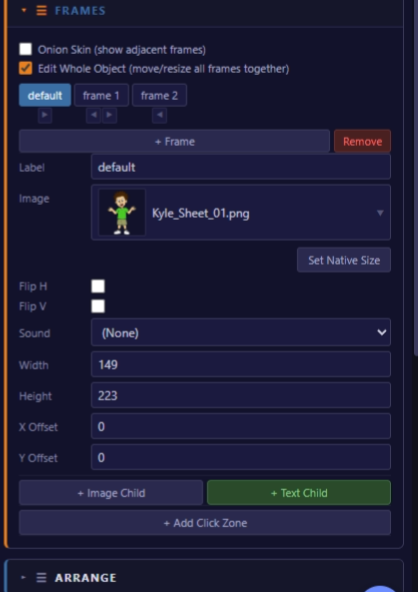
The Frame Editor — set frames and FPS for sprite-sheet style animation.
Frame Children
In the Frame Editor, each individual frame can have "child objects" — additional sprites that appear only during that specific frame. Children are positioned relative to the parent object.
This enables complex multi-part animations without sprite sheets:
- A monster sprite that opens its mouth (mouth child appears on frames 3–5)
- A clock with separately animated hour and minute hands
- A character whose eyes blink (blink overlay child on frame 6)
KeyPickup. At 0ms: key at its normal position, full opacity. At 300ms: key raised 50px upward, opacity 0. In the item pickup event, add "Play Animation: KeyPickup" before "Hide Object" — the key floats up and fades out before disappearing.